Showing posts with label crochet. Show all posts

Friday, December 23, 2016

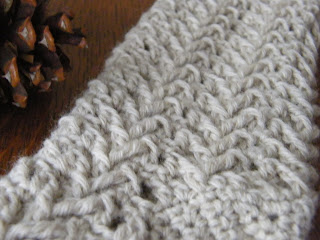
Simple Glamour Scarf

Growing up, the family player piano was at my Grandma's house. One of the rolls we loved to play and sing was "Sunny Side of the Street" - a jazzy tune from the 1930s with peppy lyrics by Dorothy Fields:
Grab your coat and get your hat...leave your worry on the doorstep... just direct your feet... to the sunny side of the street. Can you hear a pitter-pat? And the happy tune is your step... life can be so sweet... on the sunny side of the street!
If you are not familiar with this song, you can take a moment and hear Louis Armstrong perform On the Sunny Side of the Street. I'm not normally a jazz person, but this song brings back many happy memories from my childhood.

This song always makes me think of the glitz and glamour of that era. My goal in making this scarf was to create a way to add a bit of glamour and sunshine to an outfit with out adding an overwhelming amount of shimmer.  I also wanted to create a scarf that would look delicate, and be warm and cozy for the winter weather.


 Materials: 

  • 3 50g balls (202yds each) of Vanna's Glamour yarn in Topaz
  • Size H8 (5.00mm) hook
  • Scissors

Abbreviations: 

  • st: stitch
  • ch: chain
  • dc: double crochet
  • vs: v-stitch (see below)
  • pvs: puffy v-stitch (see below)

Special Stitches: 

  • V-Stitch (vs): dc, ch1, dc in same space/stitch
  • Puffy V-Stitch (pvs): ps, ch1, ps in same space/stitch

To begin: ch 48, turn

Row 1: dc in 4th st from hook (turn counts as first dc), dc in each st across, ch3, turn (45 sts)

Row 2-3: skip 1st st, dc in each st across, ch3, turn (45 sts)

Row 4: skip 1st st, dc in next 2 dc, skip 1 dc, vs in next dc, *skip 2 dc, vs in next dc*, repeat ** across until 5 sts from the end, skip 1 dc, dc in next 3 dc, ch3, turn. 

Row 5-7: skip 1st st, dc in next 2 dc, pvs in first ch1 space, *vs in next ch1 sp, pvs in next ch1 space*, repeat * * across until 3 sts from the end, dc in last 3 dc, ch3, turn. 

Row 8: skip 1st st, dc in next 2 dc, vs in each ch1 space across until last 3 sts, dc in last 3 dc, ch3, turn

Row 9-11: skip 1st st, dc in next 2 dc, vs in first ch1 space, *pvs in next ch1 space, vs in next ch1 space*, repeat * * across until 3 sts from the end, dc in last 3 dc, ch3, turn. 

Row 12: repeat row 8

Row 13-15: repeat rows 5-7

Row 16-20: repeat row 8

*Repeat pattern from rows 5-20 as many times as you wish to complete the length of the scarf. End with a row 16 of a repeat. My scarf has a total of 7 repeats before I finished it off.


To finish: 
Finishing Row 1: skip 1st dc, dc in next 2 dc, *dc in the dc, dc in the ch1, dc in the dc* of each v-stitch across the row, dc in each of the last 3 dc, ch3, turn

Finishing Row 2: skip 1st dc, dc in each dc across the row,  ch3, turn. 

Finishing Row 3: skip 1st dc, dc in each dc across the row, cut thread, tie off, weave in ends. 


Make sure you grab your scarf, along with your coat and hat when you direct your feet to the sunny side of the street.  Enjoy! 

Creative Commons License
Simple Glamour Scarf by Emily Bittel is licensed under a Creative Commons Attribution-ShareAlike 4.0 International License.

Monday, December 19, 2016

"Summer" Trails Hat

This past summer, my husband and I were getting ready for another backpacking trip. This time, we were going to be climbing South Sister, and then hiking around the Three Sisters in the three sisters wilderness. The forecast said that it was supposed to be about 40 degrees on the summit, with wind.


Knowing how chilly I get, I knew I needed a little wool hat to keep my noggin warm. I found some scrap wool yarn in my yarn stash, and set out to make a simple wool hat. It was cute, with stripes of dark gray, light gray, and teal green.

My husband came home and decided he wanted it. Ah well.

So I went to the yarn store and bought myself some pretty purple yarn I thought would go with my daypack. At that point, I forgot that my down jacket was also purple. Hmm...


I finished this hat on the way to the trailhead. It was about a three hour drive from our house, but this simple hat design did not require three hours to execute. No ma'am. It is your basic double-crochet hat and works up super-quick.

Supplies
  • Size I or 5.5mm crochet hook
  • I used part of a skein of Patons North America Classic Wool, worsted weight yarn and a little leftover light gray of the same kind for the edging. 
  • Scissors
  • A long car ride to the trailhead...optional, but oh, so fun!
Abbreviations
  • st - stitch
  • ch - chain stitch 
  • sc - single crochet
  • dc - double crochet
Starting at the toe... 
To begin: Make a magic ring, 

Round 1: ch 2 (counts as first dc, here and throughout pattern), 11 dc in the magic ring, join with slst to top of ch2
Round 2: ch 2, dc in same st, 2 dc in each st around, join with slst to top of ch2
Round 3: ch 2, dc in same st, *1 dc in next st, 2 dc in next st*, repeat * * around (ends with 1 dc), join with slst to top of ch2
Round 4: ch 2, dc in same st, *1 dc in the next 2 sts, 2 dc in the third*, repeat * * around (ends with 1 dc), join with slst to top of ch2

Here you have a choice, you can skip to round 6 if you would like a tighter-fitting hat (I did) or you can continue the increase in order to make it larger with round 5. 

Round 5: ch 2, dc in same st, * 1 dc in the next 3 sts, 2 dc in the fourth*, repeat * * around (ends with 1 dc), join with slst to top of ch2

Round 6: ch2, dc in each st around, join with slst to top of ch2

Rounds 7-14 (or as long as you need): repeat round 6

Round 15: ch2, dc in each st around, join with slst (pulling up the new color) to the top of ch2 (you can look on youtube for how to do this, but it saves cutting the thread, making a knot, and starting a new yarn... although if that's simpler for you, go for it)

Round 16: ch1 (counts as first sc), sc in each st around (trap your yarn tails from the color change inside your sc) , join with slst to top of ch1, cut thread, tie off, tuck in ends. 

And there you go! A quick and simple, thin but wool summer trail hat! 

Creative Commons License
This work is licensed under a Creative Commons Attribution 4.0 International License.

Wednesday, August 3, 2016

Silent Night Christmas Stocking

It seems a little strange to be writing Christmas stocking patterns in August, but the reality is that once the fall starts rolling, there is not a lot of time left for creative pursuits.

A few years ago, I made Skinny Christmas Stockings for my husband and I. I really like how they turned out - they're cute and simple looking...

And then I saw a picture online of a fireplace with crochet stockings in a couple different patterns in a variety of neutral colors, and I really liked the way that looked. So, I want to design a couple more patterns to go with my original Skinny Christmas Stockings, in case someone wanted to do something like that (or if I want to do it when I have kids someday...)

I have yarn in a soft country blue and a heathered charcoal gray sitting in my yarn trunk right now. I bought them for some Christmas gifts I thought I was going to make last Christmas, and never did. I'm trying to use up that yarn and make some pretty things before I buy more.  Creamy oat, charcoal, and country blue are beautiful colors together, and would make for a beautiful farmhouse Christmas.  I may not have a farmhouse, but I can imagine it would be delightful!


Supplies
  • Size H or 5.00mm crochet hook
  • I used about half a skein of Big Twists Value Solids yarn in medium denim, about 200 yards. 
  • A length of ribbon for hanging your stocking
  • Scissors
Abbreviations
  • st - stitch
  • ch - chain stitch
  • sp - space
  • ch1 space - chain 1 space
  • slst - slip stitch
  • hdc - half double crochet
  • dc - double crochet
  • fpdc - front post double crochet
  • rsc - reverse single crochet (aka "crab stitch")
  • sc2tog - single crochet 2 together
  • sc6tog - single crochet 6 together
  • ps - puff stitch
To make it larger, increase starting ring by multiples of 2. (Each starting hdc in the magic ring will be tripled by time you finish the toe). 

Starting at the toe... 
To begin: Make a magic ring, ch1

Round 1: 12 hdc in magic ring, slst to top of first hdc. 12 sts.

Round 2: ch1 (does not count as a stitch, here or elsewhere unless otherwise noted), 2 hdc in each st around, slst to top of first hdc. 24 sts

Round 3: ch1, 1 hdc in each st around, slst to top of first hdc. 24 sts

Round 4: ch1, *1 hdc in next st, 2 hdc in next st,* repeat * * around, join with slst to top of first hdc. 36 sts.

Round 5: ch1, hdc in each st around, join with slst to top of first hdc. 36 sts.

Round 6 - 7: Repeat round 5. 36 sts. 


Begin foot...
Round 8: ch 3 (counts as 1st dc and ch1), dc in same stitch; *skip 2 sts; dc, ch1, dc in next st*; repeat * * around. Join with a slst to the 2nd ch in the ch3. You should end up with 12 "V's".

Round  9: slst to "ch1" space (it should be right next to where you joined the previous row), ch 3 (counts as 1st dc and ch1), dc in same st; in next ch1 space: ps, ch1, ps; *in next ch 1 space: dc, ch1, dc; in next ch1 space: ps, ch1 ps*; repeat * * around, ending with a ps set. Join with a slst to the 2nd ch in the ch3. You should have six normal V's and six ps V's. 

Round 10: slst to "ch1" space (it should be right next to where you joined the previous row), ch 3 (counts as 1st dc and ch1), dc in same stitch; *skip 2 sts; dc, ch1, dc in next st*; repeat * * around. Join with a slst to the 2nd ch in the ch3. You should end up with 12 "V's".

Round 11: slst to "ch1" space (it should be right next to where you joined the previous row); ps, ch1, ps in that 1st ch space; in next ch1 space: dc, ch1, dc; *in next ch1 space: ps, ch1, ps; in next ch1 space: dc, ch1, dc*; repeat * * around. Join with a slst to the ch1 space between the first two ps. You should have six normal V's and six ps V's. 

Round 12: slst to "ch1" space (it should be right next to where you joined the previous row), ch 3 (counts as 1st dc and ch1), dc in same stitch; *skip 2 sts; dc, ch1, dc in next st*; repeat * * around. Join with a slst to the 2nd ch in the ch3. You should end up with 12 "V's".

Rounds 13-15: repeat rows 9-11, respectively


Begin the heel...
"Round" (row) 16: slst to "ch1" space, ch1, 2 sc in same space; *2 sc in next ch1 space*; repeat 4 more times. 12 sc total

"Round" (row) 17: ch1, rotate project, sc in each sc across. 12 sc total.

"Round" (row) 18: ch1, rotate project, sc in each sc across, 12 sc total

"Round" (row) 19: ch1, rotate project, sc 2 tog across the previous row. 6 sc 2 tog total.

"Round" (row) 20: ch1, rotate project, sc 6 tog, ch1. 1 sc 6 tog total.

Rejoining with stocking body...
Round 21: working across the heel, slst to space just to the right of the sc6tog from the previous row, ch3, dc in same space; work 1 more dc, ch1, dc along heel; work next dc, ch1, dc in same ch1 space as was used for the starting row of the heel back in "round" 16; *in next ch1 space: dc, ch1, dc*; repreat * * in next 5 ch1 spaces; work next dc, ch1, dc in the same ch1 space as was used for the starting row of the heel; work 2 more dc, ch1, dc sets across the heel; join with slst to the 2nd chain in the ch3. You should end up with 12 V's again.

Round 22 - 37 : Repeat rounds 9-12, starting with a round 11 (just because of where you end up after the heel). 

Round 38: ch1 (does not count as sc), 3sc in ch1 space; *3sc in next ch1 space*; repeat * * around; join with slst to top of 1st sc. 36 sc total. 

Round 39: ch2 (does not count as dc), dc in each sc around, join with slst to top of 1st dc. 36 dc total. 

Round 40: ch2 (does not count as st), fpdc in same st as ch2, fpdc in each dc around; going with slst to top of first fpdc. 36 fpdc

Round 41: ch2 (does not count as st), fpdc in same st as ch2, fpdc in each fpdc around; going with slst to top of first fpdc. 36 fpdc

Round 42: Repeat round 41. 

Round 43: ch1, reverse sc (crab stitch) in each st around; join with slst to first reverse sc, cut thread, tie off, weave in ends. Attach a ribbon for hanging over your fireplace. Wait for Christmas and see what happens.


I love the way the puff stitches almost look like little hearts. The stitch pattern is very sweet and cozy. I have another pattern idea for this stitch... stay tuned! 

Enjoy!


Wednesday, July 27, 2016

Faux Knit Infinity Scarf

I tried to learn how to knit a few years back. Honestly, I did.

My sister-in-law gave me a video for Christmas that was a tutorial on how to knit. I learned how to cast on, I learned how to knit and purl. And then I came to the end of my first skein of yarn and had no clue. I didn't break out the DVD again. The scarf just sat. And sat. Until the day I unraveled it and crocheted a scarf instead.

Someday I'll get back around to learning how to knit. In the meantime, I'll keep crocheting. :)

The idea for this cowl came from Frayed Knot's 15 Minute Coffee Sleeve.


Faux Knit Infinity Scarf
Note: Feel free to experiment with yarn types and hook sizes. I would be really curious to know what this looks like with a bigger hook or chunkier yarn. 

Materials: 
  • size J(10) Hook
  • a little less than 1 skein (about 371 yards/339 meters) of worsted weight yarn. I used Big Twist Yarns: Value in dark teal. 
  • scissors
Abbreviations: 
  • ch: chain stitch
  • slst: slip stitch
  • sc: single crochet
  • hdc: half double crochet
To begin: Loosly chain 150 (or however long you wish to make your scarf) I figured out the length of my starting chain by looping it around my head the number of times I wanted it to wrap (twice). Join with a slst to the top of first ch to form a ring (be careful not to twist). 

Round 1:  hdc in the back ridge loop of each chain. (This is the slowest part.) When you get to the end of the round, do not join. 

hdc in the back ridge loops

Round 2: Without joining, hdc in the back loop of the first hdc of the previous row. Slide a piece of yarn of a different color in that stitch to mark it. Continue placing hdc stitches in the back loop of each hdc stitch in the round. 

Round 3 (and until you're almost out of yarn, or your scarf is wide enough): repeat round 2. 

Final round: Without joining, sc in the back loop of each hdc in the round. (Be sure to move your thread up to mark the first sc!) Finally, join with a slst to the top of your first sc. Cut your yarn and weave in your ends.


This pattern is a quick one. It turns out fairly thick and by wrapping it around twice, it makes for a cozy cowl scarf. It's still too summery outside to wear, but I'll have something to look forward to when the weather turns chilly this fall. 


Enjoy! 

Creative Commons License
This work is licensed under a Creative Commons Attribution-ShareAlike 4.0 International License.

Wednesday, July 20, 2016

Scraps of Yarn and Intentionality

Recently, I wrote about how I am trying to be content. Yesterday, while standing in line at the craft store, I started chatting with the woman in line behind me. She was holding a giant stack of crafting paper books, leaning back to support the weight. A little wreath form was perched on top, and her phone was nestled in the wreath. Our conversation went something like this: 

"Did he just say there weren't any coupons on the app right now? I was sure I had a coupon." She shifted her paper stack to a knee and one arm and reached for her phone. 
"Are you using the 60% off paper coupon?" I asked her. "I saw it on my email and thought about getting some, but then I decided it was one of those things I would never actually get around to using." I adjusted my pinking shears and fabric cutting grid. I was building my stash of sewing supplies for a beginner curtains project for my classroom. 
She chuckled a little, looking at the pile of paper in her arms. I could tell the weight was starting to strain. "Yeah," she said, "I don't know if I'll ever use these..." 

Our conversation kind of died around then, because I was up next at the checkout and I was listening for the "I can help whoever's next." But, it got me thinking about some of my purchasing practices of late. I make an effort to buy things that I will specifically use, or for specific purposes, especially when it comes to crafting supplies. Part of it stems from the fact that I live in a fairly small house, and don't have a lot of extra space to store a big crafting stash. I also have recognized that when I find a new project, I like buying supplies specifically for that project. 

So, in my quest to be content, I've been trying to use up the scrappy, leftover yarn I do have before making a bunch of new things. Plus, I have a new classroom next year, and have been working on ideas to decorate it. 

Enter the bunting:  


I found this pattern on Ravelry, a website that has endless free and for purchase crochet and knit patterns. A designer by the name of Sandra Paul has created so many beautiful things. (I am eyeing her "Spice of Life" afghan for a future project...) I love looking at her work. The colors are gorgeous and so very cheerful. On her blog, she has a pattern for Granny Triangles. Let's just say  I was inspired...


It all started by trying to use up the leftover turquoise yarn from a blanket I made for my cousin's baby. 


I hung it up in my living room to see how it looked, and decided I really like it there. (I usually open the window shades, but it back-lights the banner and makes it hard to photograph.) Then I said to myself: these would make a really cute classroom banner... and I pulled out more of my yarn leftovers and started to work.


I was going to take the turquoise banner to school, but I kind of like it in my living room. I am planning to add some triangles of robin's egg blue fabric to the solid colored banner, along with (possibly, if there is enough) triangles of the flowery fabric I am using for the curtains in my classroom. 


I am excited to see how it all comes together. I'm trying to use up what I have and purchase supplies for specific purposes in the future. I'm trying to be intentional, and not find myself with a trunk full of yarn I really don't like but feel obligated to use because, well, I bought it for a really good deal. 

Monday, December 21, 2015

Star of Bethlehem Ornaments

The day after Thanksgiving, my husband and I hole up in our house, and avoid going anywhere. The black friday (lower case because we don't celebrate consumerism) crowds remind me of packs of piranhas, devouring merchandise and snapping up things they don't really need because, well, it is a good deal.


I have really tried to get away from making purchases when I have a few feelings swirling in my heart and mind:
  1. I avoid the "limited time only" sales that make you feel like if you do not impulse buy now, you will regret your existence later. These marketing styles tend to make me feel anxious, like I'm going to pay a whole lot of money later if I don't rush out and get that thing now.  If I start to sense that anxiety growing in my heart, I don't buy. I'm being manipulated, and that's not cool with me.
  2. I try to buy things because I need them, not because they are on sale, on clearance, or just a fabulous deal. If I spend money I would not have otherwise spent on things that I don't really need or have a use for, then I've actually wasted money. 
  3. I try to watch sale cycles. Usually if I miss a particular sale and am patient, things will go on sale again. If I know the things I want to buy ahead of time, when a limited time sale begins, I know what I want to purchase with that 20% off coupon. And if that thing never goes on sale, I evaluate whether it is something that is worth full price to me. (I also am wary of stores that always have coupons. Seriously, just price things fairly in the first place!)
  4. I do not grab things at stores as though it is a race. There is nothing in the world I need that badly. 
  5. I do not watch TV (no commercials) or read sales ads (no newspaper) so I actually avoid a lot of the campaigning that comes before black friday. 
Often, marketing is manipulation. They do this lots of different ways, and their strategies are not secrets. They parade the Joneses, they tell us we'll be beautiful, they whisper that we'll be the only ones without, they shout that these are the best prices of the century, they intimate that this is the gift that will be appreciated, and on it goes. I'm done being manipulated. It's over. It's finished.

So, instead of running out to the shops to wait in line to buy things I've been manipulated into purchasing, I stay home. We decorate our little home for Christmas. We put up our tree, I break out the Christmas music, I bake treats, and we begin to anticipate the celebration of Jesus' birth.


Yesterday, I finished making a set of these little star ornaments. I love the fact that they are little. I love the fact that they are stars. And I love the puffy part in the middle.


Here's what you will need to do to make your own...

Star of Bethlehem Ornament:
  • Size F (5) hook
  • Worsted Weight yarn. (I used the Lionsbrand Fisherman's Wool in Oatmeal... again... simply my favorite yarn.) 
  • scissors
To begin: chain 5, join with slst to first chain to form a ring, ch 1.

Round 1: *puff stitch in ring, chain 3*; repeat * * 4 more times for a total of 5 puff stitches; join with slst to top of 1st puff stitch

Round 2: slst to first ch3 space, ch1; *sc, 2 dc, ch3, 2 dc, sc* in the same ch space; repeat * * in each ch space around, join with slst to top of 1st sc; cut thread, tie off, tuck in ends

That's it. They are quick to make, and since it is worsted yarn, they didn't hurt my hands like thread and lace-work sometimes does.  I'm excited for Friday!

* To make a Puff Stitch: 

yo, stick your hook through the next st, pull one loop through st, (3 loops on hook, yo, stick your hook through same st, pull a second loop through st (5 loops on hook), yo, stick your hook through same st, pull a third loop through st (7 loops on hook), yo, stick need through same st, pull a 4th loop through st (9 loops on hook), pull loop through all the loops on hook

Creative Commons License
The Star of Bethlehem Ornament by Emily Bittel is licensed under a Creative Commons Attribution 4.0 International License.

Thursday, September 3, 2015

Frothy Latte Cowl

Fall is on its way. It's one of my favorite seasons for flavors, clothes, anticipation, and outdoor adventures. I love the crisp mornings, the yellow leaves, the pumpkin and cinnamon, the scarves, boots, and flannel.


This cowl is a two-tone cowl made with two strands of yarn held together. One is a worsted weight yarn, the other is a fingering weight yarn. I used my oatmeal fisherman's wool (love this yarn) and a left-over gray acrylic fingering yarn I had in my stash from another project. Together, you have two lovely neutral colors that will go with so many others!

Cowl scarves are easy to make and are casual and low maintenance to wear. This is a simple pattern that only requires you know how to slip stitch, chain stitch, and single crochet. It would make an excellent beginning crochet project.


Materials:
  • Two different types of yarn. I used a worsted weight and a fingering yarn. (And I honestly have no idea how much I used, because I was using remnants of the fingering and did not use up the worsted. Sorry I'm not more helpful!)
  • Size K (6.50mm) hook
  • scissors
Abbreviations:
  • slst: slip stitch
  • ch: chain stitch
  • sc: single crochet
  • ch3sp: chain 3 space
To begin: Ch 90 (or a multiple of 3) and join with slst to first ch to form a ring (being careful not to twist)

Round 1: ch1, sc in same ch from beginning chain, *ch3, skip 2, sc in 3rd ch*, repeat * * around, slst to top of 1st sc, join slst into the 1st ch3sp

Round 2: ch1, sc in same ch3 sp, ch3, sc in same ch3 space, *sc in next ch3sp, ch3, sc in same ch3sp,* repeat * * around, join with slst to top of 1st sc, slst to next ch3sp

Round 3-20: repeat round 2 (You can actually repeat the pattern as many times as you would like to get it the length you want around your neck.)

Round 21: ch1, sc in same ch3sp, ch2, *sc in next ch3sp, ch2,* repeat * * around, join with slst to top of 1st sc, cut yarn and tie off.


And there you have it! A simple cowl scarf to wear with your boots and flannel as you snuggle your lattes this fall! Enjoy!

Creative Commons License
Frothy Latte Cowl by Emily Bittel is licensed under a Creative Commons Attribution-NonCommercial-ShareAlike 4.0 International License.

Wednesday, July 1, 2015

Snowberry Cowl

Confession: I made this cowl scarf last January... as in January 2014. Life has been non-stop for quite some time! When it did stop, I was going in other directions, and never had a chance to take a picture of the project to go with the post. So, here it finally is!

We had a snow day, and my husband and I hiked in the snow to the fabric store to pick out some yarn so I could have a fun project to work on during the days off from school.  I had just gotten a new winter coat for Christmas, and wanted to make a warm scarf to go with it.

I have had more than a year to wear this cowl scarf, however, and I must say that I absolutely love it! It it so warm and fills in that gap between the coat collar and chin that will get chilled on your average winter day.

Did I mention it is simple to make?  I worked a second one up in a day to give as a gift... If you want to give this as a gift set, you could pair this with the 29-55 Beret by Pierrot (Gosyo Co., Ltd). I absolutely love this hat and it goes so well with this cowl!

(Please excuse the poor photography... but it was time to get this published!)

Supplies: 
  • Size J-10 or 6.00mm crochet hook
  • I used Lion Brand Wool-Ease yarn (medium weight 4). It took a little more than one skein, so you will want more than 200 yards. Estimate around 300 yards, and you should probably have enough. I've also made this with my favorite fisherman's wool in oatmeal... I think I'm addicted to that yarn.
  • scissors
Abbreviations
  • st - stitch
  • ch - chain
  • sp - space
  • chsp - chain space
  • sk - skip
  • slst - slip stitch
  • sc - single crochet
  • dc - double crochet
  • fpdc - front post double crochet (visit the Winter Trails Hat Pattern for an explanation)
  • ps - puff stitch (visit the Garden Lace Shawl Pattern for an explanation)

To begin: ch 96, join with slst to first chain (be careful not to twist your yarn!)

Round 1: ch2 (counts as first dc), *sk 2 ch, ps in 3rd ch from hook, ch2, ps in same st, skip 2 ch, dc in 3rd ch from hook,* repeat * * around, join with slst to top of ch 2

Round 2: ch2, fpdc around ch2 from round 1, *ps, ch2, ps in next ch2 space, fpdc around next dc,* repeat * * around, join with slst to top of 1st fpdc

Round 3: ch2, fpdc around fpdc directly below from round 2, *ps, ch2, ps in next ch2 space, fpdc around next fpdc,* repeat * * around, join with slst to top of 1st fpdc

Note: Your first ch2 should be hidden behind the first fpdc.

Round 4-20: repeat round 3

To finish:  ch2, fpdc in fpdc in row below, *ch2, sc in ch2 space, ch2, fpdc in next fpdc,* repeat * * around, join with slst to top of fpdc, tie off, break yarn, weave in the ends

Feel free to add more row repeats if you wish for a taller cowl. If you would like to make the cowl longer, increase your starting chain by multiples of 6.

Let me know if you have any questions! Have fun with this one! I always find the puff stitch somewhat relaxing...I'm not sure why!


Creative Commons License
Snowberry Cowl by Emily Bittel is licensed under a Creative Commons Attribution-NonCommercial 4.0 International License.

Saturday, November 30, 2013

Skinny Christmas Stocking Pattern

It feels like decades since I have posted here... teaching has been busy, busy, busy!

After making a shawl for my grandmother-in-law last Christmas (subbing schedule = lots of time for handmade gifts...) out of LionBrand Fisherman's Wool in Oatmeal, I realized I wanted to make Christmas stockings for my husband and I in a cable pattern. I had made a pair of cable crochet stockings for my nephews and was inspired to make some for myself.

However... I have a very small fireplace and wanted to make long, skinny stockings. So, after browsing my copy of Robyn Chachula's Crochet Stitches Visual Encyclopedia: 300 stitch patterns, edgings, and more, I found a stitch I liked: the Jeobneun Stitch. It was just the right mix of texture, cables, and delicate to meet my needs. And thus, the stockings were born...


Supplies
  • Size H or 5.00mm crochet hook
  • I used less than 465 yards of Fisherman's Wool (medium worsted weight) yarn to make 2 stockings. There is plenty left over to make something else... Christmas ornaments or garland anyone?
  • A length of ribbon for hanging your stocking
  • Scissors
Abbreviations
  • st - stitch
  • ch - chain stitch
  • sp - space
  • chsp - chain space
  • sk - skip
  • slst - slip stitch
  • hdc - half double crochet
  • dc - double crochet
  • fpdc - front post double crochet
  • rsc - reverse single crochet (aka "crab stitch")
  • sc2tog - single crochet 2 together
Special Stitches
  • starting post stitch (starting post st): ch2, yo twice, insert hook around middle st of the set of 5 dc two rows below (from front to back to front - like in a fpdc), yo, pull up a loop, yo, pull through 2 loops on hook, yo, pull through 2 loops on hook, yo and pull through all loops on hook
  • right post stitch (right post st): yo, insert hook in next sc (1st in set of 5), pull up a loop, yo, pull through 2 loops (2 loops on hook), yo twice, insert hook around middle dc of 3dc set two rows below (from front to back to front - like in a fpdc), yo, pull up loop, yo, pull through 2 loops on hook,  yo, pull through 2 loops on hook (3 left on hook), yo, pull through all 3 loops on hook
  • left post stitch (left post st): yo twice, insert hook around middle dc of 3dc set two rows below (front to back to front - like in a fpdc), yo, pull up a loop, yo, pull through 2 loops on hook, yo, pull through 2 loops on hoook (2 left), dc in next sc of working row and complete by pulling through all loops on hook

Starting at the toe...
To begin: Make a magic ring, ch1

Round 1: 12 hdc in magic ring, slst to top of first hdc

Round 2: ch 1, 2 hdc in each st around, slst to top of first hdc

Round 3: ch 1, 1 hdc in each st around, slst to top of first hdc

Round 4: ch 1, *1 hdc in next st, 2 hdc in next st,* repeat * * around, join with slst to top of first hdc (ends with 36 sts)

Round 5: ch 1, hdc in each st around, join with slst to top of first hdc

Round 6 - 7: repeat round 5


Begin foot...
Round 8: ch 2 (counts as first dc, here and throughout body of the stocking), dc in next 4 sts, ch1, sk1, *dc in next 5 sts, ch1, sk1,* repeat * * four more times, join with slst to top of ch 2 (created 6 sets of 5 dc)

Round 9: ch 1, sc in same st, sc in next 4 sts, ch1, sk1, *sc in next 5 sts, ch1, sk1,* repeat * * four more times, join with slst to top of ch1 (6 sets of 5 sc)

Round 10: starting post st, dc in next 3 sts, left post st, ch1, sk1, *right post st dc in next 3 sts, left post st, ch1, sk1,* repeat * * four more times (six sets total, including starting set), join with slst to top of starting post
Round 11-21: repeat rows 9 & 10

Begin heel...
Round 22: ch 1, sc in same st, sc in next 4 sts, sc in ch space, sc in next 5 sts, sc in ch space, sc in next 5 sts, ch 1, turn

Round 23: sc in each st across, ch1, turn

Round 24-26: repeat round 23

Round 27: sc2tog across row, ch1, turn (9sts + ch1)

Round 28: sc2tog across row, ch1, turn (4sts + ch1)

Round 29: sc2tog across row, ch1, turn (2sts + ch1)


Rejoining with the stocking body...
Round 30: work 9 sc across heel, ch1, sk1 (sk the ch1 space), sc in next 5 sts, ch1, sk1 (sk the ch1 space), repeat * * two more times, work 8 more sc across heel, ch 1, join with slst to 1st sc

Round 31: slst until you are 5 sc away from the 1st ch space, ch 2 (counts as 1st dc, dc in next 4 sts, ch 1, *right post st, dc in next 3 sts, left post st,* repeat * * twice, dc in next 5 sts, ch 1, sk1, dc in next 5 sts, ch1, sk1, join with slst to top of ch2

Round 32-55: repeat rows 9 & 10 (total of 12 pattern repeats on "leg")

Round 56: repeat row 9

Begin cuff...
Round 57: ch2, dc in each st around (including ch spaces)

Round 58: ch 2, fpdc around ch2 from round below (hiding the ch2 in the working row), fpdc in each st around, join with slst to top of first fpdc

Round 59-60: repeat round 58

Round 61: ch1, reverse sc (crab stitch) in each st around, slst in last st, cut yarn, weave in ends.


Use a length of ribbon to create a loop for your stocking. Hang by fireplace, (carefully - don't let it catch fire!) and wait. This pattern has not been tested, so if you give it a try and have questions or run into issues, please contact me!

Blessings to you and your family as your enter into this Christmas season. May you be filled with unspeakable joy and peace!

Creative Commons License
Skinny Christmas Stocking Pattern by Emily Bittel is licensed under a Creative Commons Attribution-ShareAlike 4.0 International License.

Thursday, July 25, 2013

Be transformed.

I got a job.

An honest-to-goodness, I-will-have-my-own-room-and-students, oh-my-goodness-I-have-so-much-work-to-do, I-am-surrounded-by-textbooks-and-planning-materials kind of job. School starts in a little over a month, and I am knee-deep in the river of planning.

A more accurate statement might be: I've dipped my toe in the river of planning and am a bit leery of completely submerging, but I know it will need to happen soon.

When I was back in the world of subbing, I initialled a student's hall pass and realized something wonderful: My initials make a butterfly.

So, a few weeks ago, when I found out about the job, I starting making classroom decorations... with some leftover yarn and my crochet hook. Are you ready?


I absolutely adore this butterfly pattern! It's called "Butterfly Grace" by Chrissy and is a free Ravelry download. I have many, many more to finish into the little winged creatures...


The best part about these beautiful butterflies? They remind me of the verse Romans 12:2. It goes like this:
Do not conform to the pattern of this world, but be transformed by the renewing of your mind. Then you will be able to test and approve what God’s will is—his good, pleasing and perfect will. (NIV)
This is such a challenging verse - give up conforming to the world... that's hard to do. But oh! How I long to be transformed into the likeness of Christ!

So, as I hang these little butterflies around my room, I will be hanging little reminders to myself...  
Be transformed.

Wish me luck as I begin this new adventure! I'm so excited!

Tuesday, March 26, 2013

Garden Lattice Shawl Pattern

This playful triangle scarf has been in progress for a few months.  I was inspired to make the main body of the scarf a while ago, and then set the scarf aside to think through what to do about edging the design in a way that would not detract form the simplicity of the scarf.  I don't currently own any fringy triangle scarves, and think this might be a fun addition to my growing scarf collection.


Materials
  • sizes G and E crochet hooks
  • size 1 yarn - superfine, between 400 and 460 yards (I used under 2 skeins of Deborah Norville Serenity Sockweight in soft white.)
  • scissors
Abbreviations
  • ch - chain
  • slst - slip stitch
  • st - stitch
  • sc - single crochet
  • dc - double crochet
  • ps - puff stitch (see below)


To begin: Using size G hook, ch 201 (or multiples of 6+3), ch 1, turn

Row 1: sc in 2nd st from hook, *ch3, skip 2 ch, sc in 3rd ch from hook,* repeat * * until last 3 sts, ch 1, skip 2 sts, dc in last ch, ch1, turn

Row 2: sc in same ch space, *ch3, sc in next ch space,* repeat * * across until you reach the last ch 3 space, ch 1, dc in last ch 3 space, ch 1, turn

Row 3:  sc in same ch space, *ch 3, sc in next ch space, ch 3, ps in next ch space,* repeat * * across until you reach the last 2 ch 3 spaces, ch 3, sc in next ch space, ch 1, dc in next ch space, ch 1, turn

Rows 4-55/56: repeat rows 2 and 3 until you reach the tip of your triangle

To make the edging: 
Switch to size E hook.
Attach yarn to one corner of the top of the scarf.  *Ch 15, slst into 10th ch from hook (creates loop), ch 5, sc in next ch space along the edge of the scarf,* repeat * * along edge to the bottom point of the scarf, ch 15, slst into 10th ch from hook, ch 5, sc in point space, *ch 15, slst into 10th ch from hook, ch 5, sc in next ch space  along the edge of the scarf until you reach the opposite corner, cut yarn, tie off, weave in ends.


To make a Puff Stitch: 

yo, stick your hook through the next st, pull one loop through st, (3 loops on hook, yo, stick your hook through same st, pull a second loop through st (5 loops on hook), yo, stick your hook through same st, pull a third loop through st (7 loops on hook), yo, stick need through same st, pull a 4th loop through st (9 loops on hook), pull loop through all the loops on hook

Creative Commons License
Garden Lattice Shawl by Emily Bittel is licensed under a Creative Commons Attribution-ShareAlike 3.0 Unported License.

Friday, January 18, 2013

Hearts on a String...

Recently, I was at the store and found some adorable painted metal heart decorations... and one thing led to another... and so far I have made two different valentines day heart garlands as gifts... and I'm planning to make one for myself.

Country Hearts Garland

Lacy Hearts Garland
So, if you are in the mood for a pretty quick crochet project to share the love this Valentine's Day, then get your hook and yarn ready.

Supplies: 
  • yarn (The kind of yarn isn't super important - think of this more like guidelines than anything else. I used worsted weight cotton for the Country Hearts Garland and thread for the edging and stringer for the Lacy Hearts Garland); You will need a decent amount of yarn for the stringer; unfortunately I was using yarn left over from another project and am not good at estimating lengths...  Feel free to let me know if you figure this out. :) 
  • Size G or 4 mm hook for the Country Hearts Garland and size E for the stringer and edging on the Lacy Hearts Garland.
  • Scissors

Step 1: Pick your heart pattern and make your hearts.

I used two different heart patterns for the different garlands! There are a ton of different options out there... take some time to browse around and find one you like! 

Lacy Hearts Border Pattern: 

Start in the 3rd st along the side of the heart with the stitches showing:
Round 1 - ch 1, sc in same st, sc in each st around moving toward the two lobes of the heart, slst in the sc between the two lobes, then 1 sc in each st back around to the point, put 3 sc in the point, continue with 1 sc in each st and join with a slst to the top of your first sc.
Round 2 - (You may have to fudge some of these, but it should come out fairly close) ch 3 (counts as 1st dc), 4 dc in same st, skip 1 sc, sc in next st, {skip 1 sc, 5 dc in next st, skip 1 sc, sc in next st,} repeat {} around to the slst between the lobes of the heart where you sc down into the space below to help define the heart shape, repeat {} around to the point of the heart, 5 dc in the point, ch 4, slst to 1st ch st (makes picot), 4 dc in the point, skip 1 sc, 5 dc in next st, skip 1 sc, sc in next st, join with slst to top of ch 3, break thread, tie off, weave in the ends.
Once you have your hearts all made, you're ready to start making your garland string. 
Step 2: Make your stringer.
The stringer is the same for both garlands, the Lacy Hearts stringer is just made out of thread and a size E hook instead of worsted cotton and a size G hook like the Country Hearts Garland (above).

Lace Garland Stringer Pattern: 
To begin (makes 1st two rows): ch 4, 2 dc in 4th ch from hook, ch 2, 2 dc in same st, ch 3, rotate 180 degrees, 2 dc in same st, ch 2, 2 dc in same st, ch 3, turn
Row 3: 2 dc in ch 2 space, ch 2, 2 dc in same space, ch 3, turn
Repeat row 3 until your stringer has reached the desired length.  

Step 3: Attach your hearts. 
Attach the hearts using string, spacing them evenly along the same side of the stringer.  
  • For the Country Hearts Garland, I left 41 rows before I started attaching hearts, spacing each heart 10 rows apart. I tied the hearts to the stringer by looping an 11-in length of string through both the top of the heart and the ch 3 loop of the stringer, tying them off with a knot and then tying the ends into a bow.
  • For the Lacy Hearts Garland, I left 42 rows before I started attaching hearts, spacing each heart 20 rows apart. I tied the hearts to the stringer by looping a length of the thread through the top of the heart and the ch 3 loop of the stringer, keeping the knot close to the top.  I wove the loose ends into the stringer after I had made the knot to hide them and give it a cleaner look.

Step 4: Sit back and admire your handiwork!